How to Change Image Background Colors Using Luminance Masking in 2024
How to Change Image Background Colors Using Luminance Masking in 2024 - Using Luminance Masks to Isolate Background Areas in LR Classic 2024
Lightroom Classic 2024 introduces a powerful new way to isolate image backgrounds: Luminance Masks. Found within the Develop module's masking tools, the Luminance Range Mask allows users to specifically target and adjust areas based on their brightness or darkness. This lets you fine-tune exposure or color in just the highlights or shadows, offering greater control than ever before. The expanded Masking panel complements this, allowing for multiple edits within a single mask. This means more complex adjustments can be made in one workflow rather than resorting to a patchwork of separate edits, potentially speeding up the editing process.
While the tools appear to be quite potent, some users have reported minor issues like unintended pixel compression in areas masked with luminance. This suggests the new tools need careful management to get the best outcome. Despite this, the introduction of Luminance Masks in Lightroom Classic 2024 is an important development that pushes the boundaries of how users can control image elements and achieve their desired edits.
In the latest iteration of Lightroom Classic, version 2024, the developers have introduced a set of masking tools aimed at streamlining and enhancing the local editing process. Among these, the luminance masking feature stands out as a potent tool for isolating and refining image sections based on their brightness values. This implies we can target specific areas – shadows, highlights, or a gradation of brightness in between – for adjustment without spilling over into other parts of the image.
The utility of luminance masking is particularly evident in scenarios like landscape photography, where diverse light conditions can exist within a single scene. By employing luminance-based selection, adjustments become more precise, enabling photographers to subtly emphasize or diminish specific tonal regions of the image. It also becomes possible to reveal otherwise hidden subtleties in textures and details within background elements. This ability to pinpoint and isolate details based on luminance contrasts with traditional color-based selection, which is limited by the color values themselves.
Lightroom's implementation of luminance masking is user-friendly in that it relies mostly on slider controls within the masking panel. This accessibility caters well to a wider user base, avoiding the complex selection techniques often found in other image editing programs. Furthermore, Lightroom's built-in AI elements can accelerate the isolation process, automatically recognizing and proposing mask areas based on the image’s histogram. This automatic mask generation can save considerable time in background isolation tasks, bypassing the need for manual selection, albeit some oversight is still required to fine-tune results.
Interestingly, Lightroom’s luminance masks can be layered with other masking methods, such as color or depth masks, allowing for multi-faceted adjustments. This feature increases the flexibility for complex image editing workflows, making it possible to orchestrate more involved adjustments with increased control. It's important to understand that the live nature of the luminance mask adjustments facilitates an iterative process, encouraging a series of subtle adjustments. This is helpful in avoiding over-correction and achieving more nuanced and balanced outcomes. However, I've also found that the 'feathering' feature within the mask tools is often overlooked, even though it plays a crucial role in creating softer, more integrated transitions and preventing stark boundaries within the edited areas.
While primarily known for its individual utility, the integration of luminance masking fundamentally improves the overall editing workflow within Lightroom Classic. This enhanced ability to make specific and detailed edits results in faster editing times without sacrificing image quality. It is important to note, though, that while the Lightroom developers have designed the tool to be more intuitive and user-friendly, some users report issues with unwanted side-effects, including some image compression artifacting within the affected areas. These unexpected glitches can impede the smooth application of masks in certain images. It will be interesting to see how the developers address these complaints in future updates.
How to Change Image Background Colors Using Luminance Masking in 2024 - Mastering the Select Subject Tool for Accurate Background Separation
In 2024, the Select Subject tool has emerged as a powerful method for achieving accurate background separation in both Lightroom Classic and Photoshop. These programs now utilize AI to identify and select the main subject of an image, paving the way for easy background manipulation. This automated process has made it much simpler to isolate subjects for edits like background color changes. The Select Subject tool, when combined with the recently introduced Luminance Masking and expanded masking panels, can significantly enhance editing precision and control. These additions enable users to refine edits within specific brightness ranges of the image, leading to more complex and detailed alterations. While these new tools streamline the workflow, it is important to acknowledge that some users have encountered issues like unwanted compression in areas selected by the AI. Overall, the Select Subject tool is a remarkable addition to the image editor's arsenal for achieving more creative control and enhancing background manipulation. It streamlines the background isolation process, opening the door to more complex and refined image alterations.
Lightroom's Select Subject tool, powered by AI, automatically identifies the main subject of a photo, making it a quick way to isolate and mask the background. This feature builds upon earlier methods that required manual masking, greatly simplifying the process. It's worth noting, however, that earlier versions of Lightroom required users to manually create and then reverse the Select Subject mask to achieve the same effect. The same functionality is offered in a more focused fashion with the Select Background tool, which automatically masks the background instead of the subject.
The concept is replicated in Photoshop with the same name, Select Subject, but it goes further, demonstrating a capability to automatically recognize multiple subjects within a single picture. This tool relies on machine learning to get better over time, and while impressively accurate, it can still miss the mark on complex images with detailed backgrounds. Refinements, often using the color picker to choose colors that define the subject from the surrounding environment, can help greatly improve selection accuracy. There is even a detailed guide for Photoshop that covers its pros and cons as well as how it differs from other selection tools.
Changing the image background, a common editing task, usually entails selecting the subject first, and then swapping the background for a new image or color. While Select Subject streamlines this process, it is essential to understand the difference between it and the Remove Background tool. It also doesn't encompass the more nuanced approaches used in high-end editing which use more complex editing workflows that require advanced editing skills.
Lightroom's new masking tools also integrate features to more realistically simulate the impact of light on the chosen areas when adjusting backgrounds. This brings a natural look and feel to an area being colorized which is a significant advancement in the realism of edits. There are certainly advantages to the newer tools and the ability to build upon them in a logical and ordered process is one of the big wins, however, I've also run into situations where unexpected image compression is observed and this may lead to some concerns around the quality of the output as a result of this. This is an area that's worth observing over the next few releases of Lightroom to determine if this issue is mitigated.
How to Change Image Background Colors Using Luminance Masking in 2024 - Working with Global and Local HSL Controls for Background Color Changes
When altering background colors, understanding how to use global and local HSL controls is vital. Global HSL adjustments affect the entire image, which can be useful for making broad color corrections. However, local adjustments give you the ability to make more precise alterations to specific areas within the image. This provides a much higher degree of control and flexibility in your edits. Adjusting saturation impacts the vibrancy of colors, while changing lightness helps control the brightness of elements within a targeted area. These controls, when used in conjunction with techniques like luminance masking, provide a powerful combination for achieving nuanced background color modifications. It's crucial to exercise caution with these controls though, as there is a potential for undesirable results like image compression to occur. Finding that right balance is key to preserving image integrity while achieving the desired visual results in a scene, especially with the more intricate edits enabled by modern tools.
1. Understanding how luminance interacts with color is key when altering background colors with luminance masking. The relationship between foreground and background hues, in terms of contrast and visual impact, becomes a central factor for aesthetically pleasing edits.
2. Our eyes are more attuned to brightness changes than color intensity. This inherent sensitivity implies that even subtle shifts in luminance can dramatically alter how an image is perceived. It highlights the importance of having good control over luminance adjustments when fine-tuning background color alterations.
3. Every image, digital or otherwise, has a limited range of brightness it can capture and process. When leveraging luminance controls, it's crucial to consider the image's dynamic range to prevent losing highlight or shadow details during background color adjustments.
4. The feathering function within luminance masking controls how smoothly transitions appear between edited and untouched sections of the image. A carefully feathered edge creates a less noticeable divide between foreground and background, contributing to a more realistic final result.
5. The ability to make both global and local adjustments differentiates how editing is done. Global adjustments uniformly affect the entire image, while luminance masking permits localized edits within specific brightness ranges. This fine-grained approach allows us to more precisely alter background colors without compromising the image's overall integrity.
6. Using histograms is crucial for effective luminance masking. Examining the distribution of tonal values in an image helps in determining which areas can be altered without introducing unwanted artifacts. Understanding how to read a histogram helps to ensure a cleaner, more professional-looking edit.
7. The introduction of AI in selection tools, like Lightroom's Select Subject, has greatly reduced the manual work involved in initial masking. Nonetheless, complex backgrounds can sometimes stump AI, requiring manual refinements to produce optimal results.
8. A surprising downside to luminance masks is the possibility of introducing image compression artifacts. These undesirable artifacts can diminish the overall quality of an image. This underscores the need for cautious application and adjustment of luminance masks to lessen the chance of quality loss.
9. Combining luminance masking with other masking tools, like color or depth masks, unlocks multi-faceted editing. This approach allows for finer control over background color changes while preserving a natural interplay between distinct edit layers.
10. The latest tools for manipulating luminance are quite good at realistically mimicking how light interacts with the image when making background color alterations. This leads to more natural-looking edits that better match the behavior of light in the real world, which is a meaningful upgrade from earlier editing methods.
How to Change Image Background Colors Using Luminance Masking in 2024 - Creating Custom Brush Presets for Complex Background Transformations
When working with complex background transformations, creating your own brush presets can be a powerful tool for photographers and digital artists seeking more control over their edits. The process typically involves designing a unique brush within programs like Photoshop, enabling you to define specific characteristics that align with your project goals. It's important to prep your image, ensuring the background is free of any clutter that might interfere with your custom brush's application. This allows for more precise painting and erasing when you apply your custom brushes during the edit process.
Additionally, tools like the Brush Settings panel give you finer control over brush shape and behaviors, adding another dimension of customization when adjusting images. Combining these custom brushes with luminance masking techniques empowers you to achieve more intricate and subtle background transformations. The outcome can be striking visual results while minimizing any compromise in the original image quality. While useful, it's worth noting that creating effective custom brushes can take time and experimentation to master, so don't expect overnight miracles.
1. Crafting custom brush presets within Photoshop allows for more nuanced application of luminance masking, especially when dealing with backgrounds having intricate tonal variations. These unique brush tools are specifically designed to seamlessly integrate adjustments into complex background areas.
2. Utilizing pressure sensitivity during the brush creation process introduces variability in opacity and flow, mirroring traditional painting methods. This dynamic approach yields more natural-looking transitions and visual appeal.
3. Researchers exploring the relationship between the Fourier Transform and image manipulation can potentially inform how brush strokes impact pixel values. A deeper comprehension of this mathematical foundation could lead to brushes that better preserve image integrity during editing.
4. The effectiveness of a custom brush is closely tied to its sampling dimensions. Smaller brushes grant more refined control, while larger brushes expedite the editing process in wide-open areas. Optimizing brush size for specific tasks can notably influence the overall workflow.
5. Custom brushes infuse a creative element into luminance masking. Predefined shapes or textures can emulate various lighting phenomena—like soft glows or directional shadows—adding artistic finesse without laborious manual alterations.
6. Manipulating brush dynamics helps create textures that are responsive to luminance shifts, a principle similar to traditional art techniques using light and shadow. This can enhance the perceived depth during background transformations.
7. Interestingly, custom brush presets have been observed to help mitigate certain artifacting problems common to luminance masking. This happens because fine-tuned brush strokes manage transitions more gracefully, reducing abrupt changes that often lead to compression artifacts.
8. Each brush preset holds associated metadata, which impacts its interaction with different image files. Understanding the technical details of these presets ensures greater compatibility and performance across diverse image types and formats.
9. The brush engine's behavior, particularly in relation to blending modes, can be strategically used to emphasize or suppress specific luminance values. This allows the edits to align better with the user's artistic vision, thus refining background manipulations.
10. Creating tailored brush presets for luminance masking allows for the preservation and reuse of complex editing processes across various projects. This results in improved consistency and editing efficiency by reducing the repetitive setup required for similar adjustments.
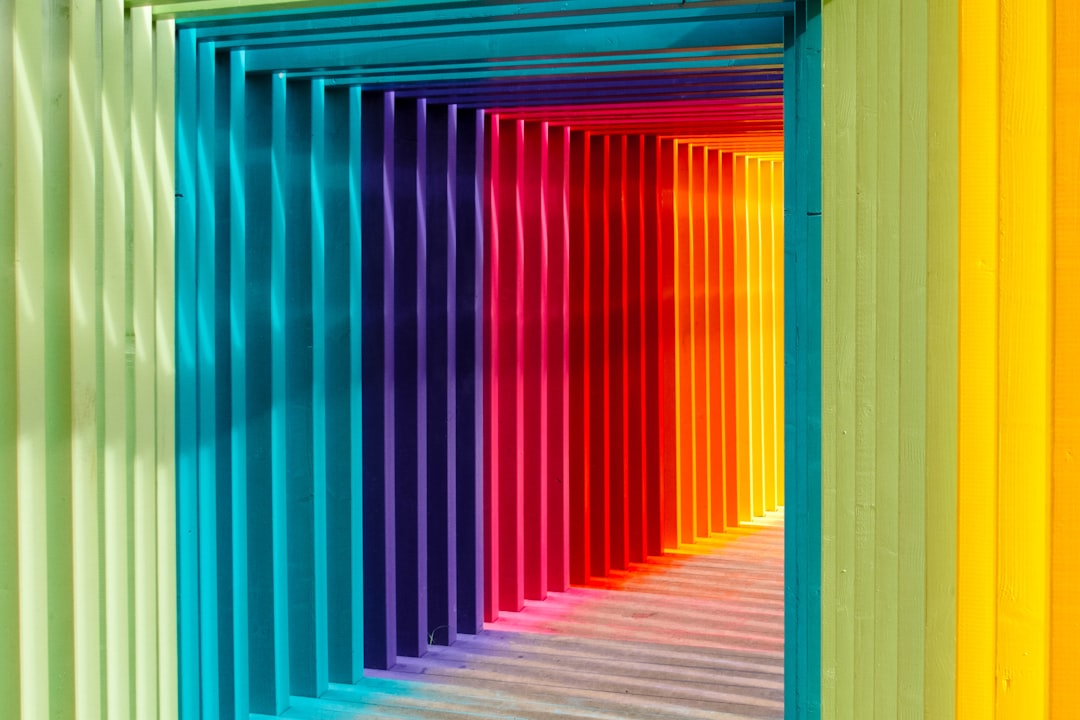
How to Change Image Background Colors Using Luminance Masking in 2024 - Applying Multiple Color Range Masks for Gradient Background Effects
Lightroom's 2024 update introduces the ability to utilize multiple color range masks, which opens up new avenues for crafting gradient background effects. This lets users isolate and refine specific color ranges with greater accuracy, enabling the creation of more intricate and compelling gradient transitions. By selecting up to five distinct colors or using shift-dragging to capture a color range, it's possible to build nuanced color gradients across the image. This added control gives users considerable power to refine their vision, however, it's important to be mindful that this increased complexity can sometimes lead to undesirable compression artifacts. It's a delicate balance, striving for complex and expressive gradients while ensuring the overall quality and integrity of the edited image is maintained.
Applying multiple color range masks offers a compelling way to achieve intricate background effects. Each mask essentially creates a separate adjustment layer, allowing for layered color adjustments that can dramatically reshape the mood and depth of an image. This process naturally builds on color theory, specifically how complementary and analogous colors interact within the color wheel. By strategically combining these color relationships, you can often achieve more visually pleasing background changes because you can more effectively control contrast and establish a sense of visual harmony.
However, when multiple color range masks are used, one often finds that undesirable color fringing or halo effects can occur. These visual anomalies are typically a side effect of adjustments that don't seamlessly integrate with each other, highlighting the need for a cautious approach in the transitional areas between these masks. Interestingly, the interplay between these overlapping masks can yield unexpected visual effects because the color mixing operates additively. This opens up new avenues for creativity, but it also requires a good understanding of how colors interact at different opacities and blending modes to avoid unwanted surprises.
Furthermore, the use of multiple color range masks can subtly bring out specific tonal ranges within an image, potentially enhancing certain textures while toning down others. This is a rather nuanced approach that has a significant impact on the perceived depth of field within a scene. In fact, this is related to how our brains process visual information: color changes within the background are often perceived as shifts in depth, creating an illusion of three-dimensionality in what may otherwise be a flat image. This provides a powerful tool for enhancing the visual impact of a photo when applied strategically.
It's fascinating to consider that each color range mask can be viewed as a unique light source, drastically impacting the overall atmosphere of the image. This perspective is helpful because we can leverage what we know about light properties, such as diffusion and intensity, to produce more realistic and natural color effects. There's also an intriguing technical aspect to using multiple masks: it raises the potential for cumulative errors. If these masks aren't carefully adjusted, it can lead to the appearance of color casts, demonstrating the need to carefully track the influence of each mask on the overall output.
Additionally, advanced image editing frequently builds on principles from psychology, especially Gestalt theory, to influence how the subject of an image is perceived against its background. Manipulating multiple color range masks can subtly impact this viewer perception, influencing how their eyes move through the image and guiding them toward specific elements within a scene. When working with multiple color masks, an understanding of color harmony and contrast becomes particularly important. A keen awareness of the difference between vibrance and saturation becomes critical to preserving a natural look even when making extensive background color changes. This careful balance between color changes and the original image ensures that the desired aesthetic is preserved.
More Posts from colorizethis.io: